
How we structure the writing process shapes not only how we articulate our ideas to the world, but also, how we work through those ideas ourselves. The digital environment in which we do that work may feel crucial to those of us who earn a living through our writing, but this environment should matter to anyone who does significant amounts of writing for work or leisure.
I wrote those words two years ago in a column about Scrivener, the writing software I use to write my columns for JSTOR Daily (and other publications). I now use Scrivener in tandem with Zotero, a bibliographic software tool that makes it easier to organize source materials and insert citations, and I’ve developed a workflow that makes it dramatically easier to draft articles based on scholarly research.
So, this month, I’m doing something a little different with my column: I’m sharing the system I use to write these columns, so that other researchers, writers, and students can use or adapt my system. If you do a lot of writing based on research in JSTOR (or other academic materials), I suspect you’ll find that the combination of Zotero, Scrivener, and Zotfile (a plug-in for Zotero) lets you work much more efficiently, and with better results.
Many writers already know Scrivener as a tool for long-form writing, and many academics already use Zotero to track their citations. As the scholars Jason Muldrow and Stephen Yoder explain in Out of Cite!:
Zotero is able to recognize the information necessary for a citation on Web sites ranging from JSTOR to Google Scholar to YouTube, and to store that readily available information in your Zotero library… Within the record you are able to attach an unlimited number of documents (Word, PDF, TXT, etc.) as well as create notes about the reference. If it is an item you found online, you can even archive a copy of the Web page and annotate the Web page directly.
These features make Zotero an ideal partner to Scrivener in writing material based on quoting or citing existing materials. Think of Zotero as the database that helps you get to an outline—or even a first draft.
It’s taken some experimentation to figure out how to use Zotero and Scrivener in a way that accelerates my writing. I’ve shared my system in detail below, which may make it look complicated: Consider following the process step-by-step and you should find it quite easy to repeat (or tweak to your own needs) in the future. You may also find it helpful to look at this sample Scrivener file (download zip file here) based on material from Zotero. My sample file includes the material I collected and organized for my recent column, “The 4 Questions to Ask Before You Unplug,” and also provides a short summary of the steps below.
Ingredients
My system uses the following pieces of software:
- Scrivener (available for Mac, Windows, or iOS) for actually writing your article or book. You can download a trial version here, which will work for 30 days. If you’re new to Scrivener and have trouble finding any of the menu options I reference in the directions below, you can look them up in the downloadable Scrivener manual.
- Zotero (free download for Mac, Windows, Linux). This is the software you will use to collect your research materials and generate citations. You may want to pay for an annual subscription that increases the amount of space available for storing your Zotero library in the cloud, but it’s not necessary to making this system work. .
- Zotero connector for your web browser (Firefox, Chrome, or Safari), so you can easily save things to your Zotero collection.
- Zotfile (a free plugin for Zotero) for extracting article highlights. Follow the instructions on the Zotfile site to get it up and running in your Zotero installation.
Step 1: Collect source material in Zotero
When I’m starting work on a new article, I begin by creating a new collection in Zotero, named for the topic of my story. Then I open my web browser and start searching in JSTOR for materials related to that topic. I’m a bit of a drunken sailor when it comes to rounding up research materials: I usually just command-click on every result that looks interesting until I have a few dozen tabs open.
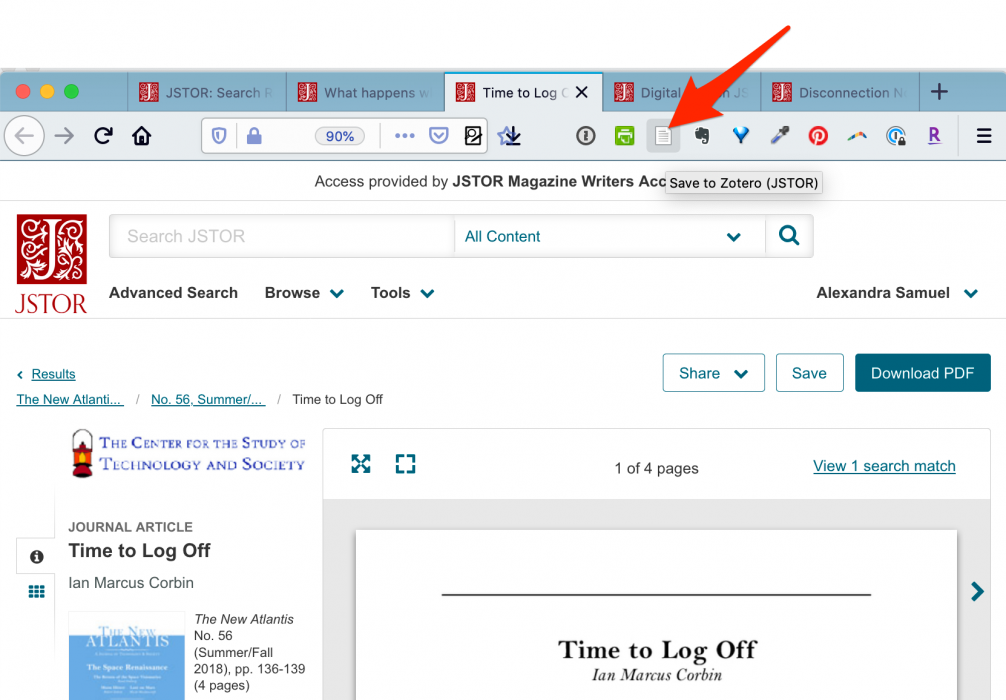
Then I click through each tab in turn, taking only a very quick look at each article to decide if it’s something I might want to read. If it is, I click on the Zotero Connector in my browser toolbar to save the article citation (and the article’s PDF) to Zotero. (For reasons that will become clear, I wait until the article is in Zotero before I actually read it—or even properly skim it.) Note that the Zotero Connector button varies a little in how it looks depending on what you’re saving, but it will always be in the same position in your browser toolbar. You’ll know that the article is saving to your new collection (and as a full PDF) when you see the little download notification pop up in your browser.
Step 2: Review and highlight your source material
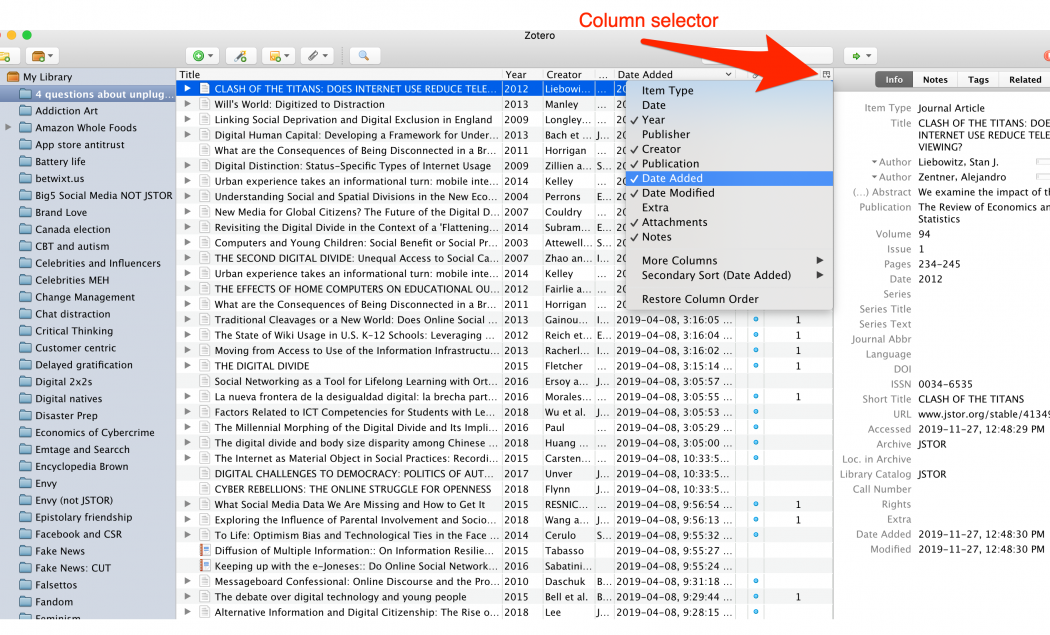
Once I’ve accumulated a promising collection of materials in Zotero, I start by reading (or skimming) the articles that I expect will be most useful to me. I usually start by sorting my collection by year, so that the articles published most recently are at the top of my window. But sometimes I refine my search keywords in the process of reviewing my initial results, which means that the most relevant results are the ones I save later in my search process. Sorting my Zotero collection based on when the item was added can make it easier to find those items and read them first. (If you don’t see the “date added” column in Zotero, just click the column selector button to see the drop-down menu that lets you choose which columns you want to view.)
When I spot an article I want to read or skim, I double-click to open the full-text PDF. Since I’m on a Mac, that PDF opens in Preview. I use the highlight tool in Preview to highlight any line or section of the article that looks like something I might want to quote or refer to while reading. If you’re reading an article that has a multi-column layout, you may need to select the text you’re highlighting by using the select tool (or option-dragging) to draw a text box around the text you want to highlight.
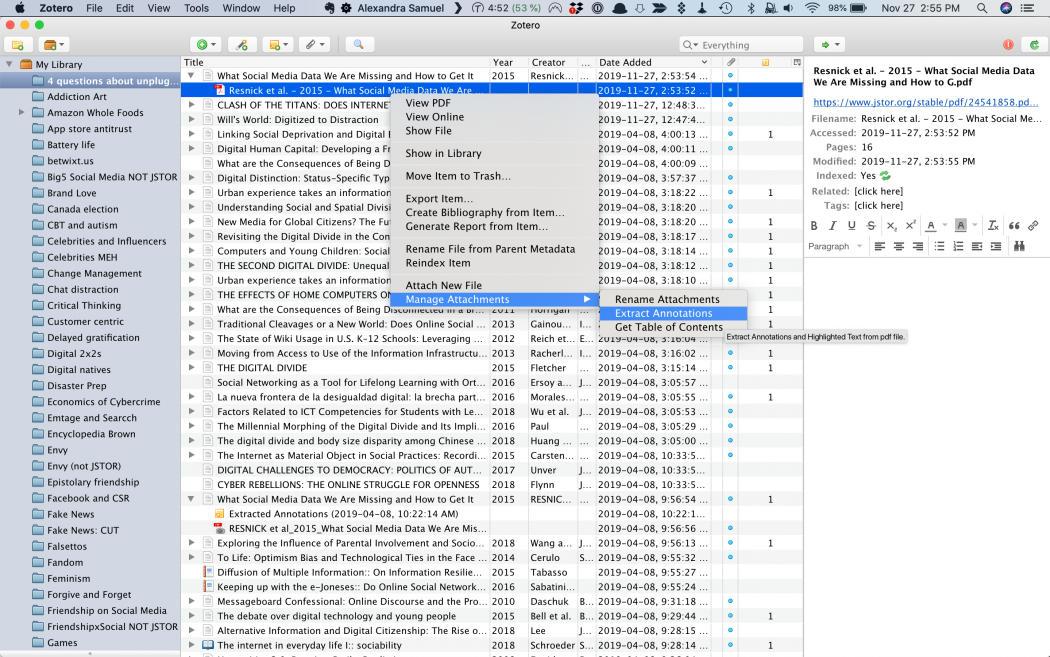
Once I’ve finished reviewing an article, I close the PDF and then return to the entry for that item in Zotero. Right-click on the item in Zotero (control-click on a Mac) to bring up the contextual menu, and then choose Manage Attachments/Extract Annotations. (This is the option you get by installing Zotfile.) Zotfile will now chug through the highlights in your PDF, and magically extract them for you, so you don’t have to type them out! It’s not perfect—it might misread a few characters here and there—but it works for me most of the time.
Continue this process for all the articles you want to read until you have extracted annotations for each article you’ve read and highlighted. As you’re reading, skimming and highlighting, notice any recurring themes or topics that are covered in the materials you’re reviewing. this will help you think about how to categorize your quotations once you get them into Scrivener.
Step 3: Export your annotations
Your next challenge is to get all those juicy quotes into Scrivener, where you can work with them. Select all the extracted annotations at once, and then right-click (Windows) or ctrl-click (Mac) to get the contextual menu. Choose “Generate Report from Items,” and you’ll get a new pop-up window with all your annotations. A hyperlink to the source citation will be included in each quotation. Select all the text in this window, and then copy and paste into a text editor with a solid search-and-replace function. (I use Microsoft Word.)
Take a moment to zip through the document and delete the item titles that appear at the top of each block of quotations: Delete everything from “Parent item” to the date stamp that follows “Extracted annotations.” They’ll be easy to spot, because they will be in bold.
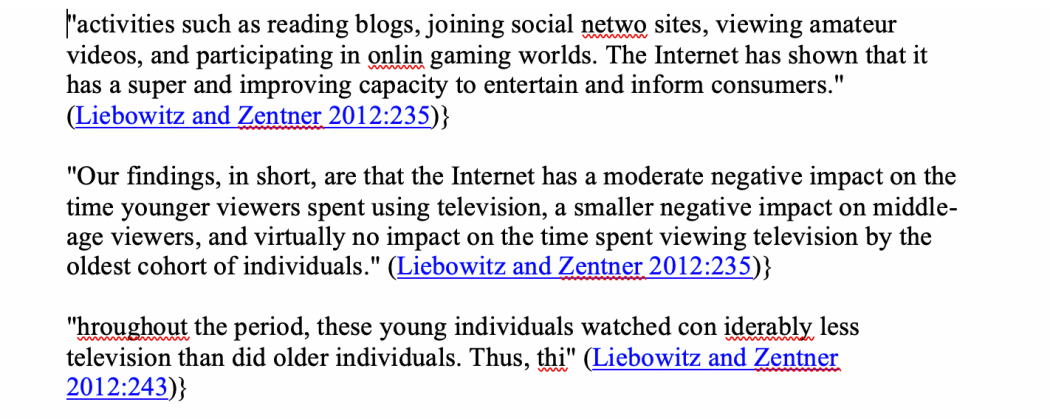
Now, you need to give Scrivener a way of recognizing the break between each individual quotation. The parenthesis that ends each citation isn’t a good bet, because lots of quotations contain parentheses within the text body. So I like to go through the document using search and replace, and replace each closing parenthesis with the combination of parenthesis plus curly bracket, like this: )} But I don’t want to replace parentheses that are inside the body of my text, so I tell search and replace to look for a parenthesis that’s followed by a line break. Then I replace it with a parenthesis, curly bracket, and line break. Your document should like something like this:
Save your document as a Word, Open Doc, or RTF file. Don’t use plain text, or you’ll lose the hyperlinks back to the original citations in Zotero. At long last, it’s time to import your quoted material into Scrivener!
Step 4: Import your quotations
Create a new folder in Scrivener with a name like “Quotations.” Next, from the File menu in Scrivener, choose Import…/Import and Split.
In the file section window, navigate to the text file you just created with all your quotations. Check the option at the bottom of the window for “Split into sections by finding separators in the text.” And for “sections are separated by,” enter a } bracket like the one you used at the end of each quotation.
Now, click the Import button. Scrivener will now import all your quotations, making each one a separate “document” inside your quotations folder. You’ll see something like this in the left-hand sidebar (what Scrivener calls the “binder”):
Step 5: Organize your quotations
By this point in my process, I usually have some idea of how I want to organize my article, or at least, I know the major topics covered by the various materials I’ve collected. If I know what my structure or subsections are going to be, I create folders for each subtopic within a “Top quotes” folder. If I don’t yet know how it’s going to work out, I just put the quotes I like best into “Top quotes” and look for themes as I go. (I often end up creating subfolders as I drag my top quotations into the “Top quotes” folder, because patterns emerge through that process.)
Because I’m usually writing for a general rather than academic audience, I care as much about whether a quote is juicy and fun to read—or exceptionally pithy and articulate—as I do about its content. So my process of looking at quotations is about style as well as substance: I start by looking for the quotations that would make for a great article, and try to weed out the quotations that won’t be particularly engaging. I create a “More quotes” folder for the quotations that don’t make the cut, dividing these into “nope” (quotes I definitely don’t want to use), “meh” (quotations that might ultimately prove useful to making a specific argument, but aren’t particularly special) and “TBD” (quotations I’m not sure about, but don’t want to slow down to decide).
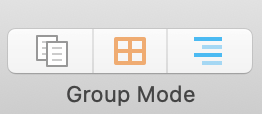
Once I have my folders set up, I zip through the individual quotation documents I just imported into my “Quotations” folder, and drag them into the various subfolders I’ve just created. (Tip: Use the “Scrivenings” group mode and set the scrivenings window to “Lock in place,” so you can see all your quotations and rapidly click through from one to the next.)
If you’re doing a long-form project, with hundreds of imported quotations, all this dragging and dropping into folders may be annoying and cumbersome. In that case, you might find it more practical to use Scrivener labels to assign categories to each quotation: Just define your own set of labels, and then use the drop-down menu to label each quote while viewing it in Outline mode.
If you need to see more of each quotation in order to categorize it, switch back to Scrivenings mode and set the view to “lock in place;” then turn on the Inspector by clicking the blue “I” in the upper right of the Scrivener window. This will give you a right-hand sidebar with details on each of your quotation documents. Navigate through your quotations by clicking in the binder. As you do, that quotation will move to the top of your Scrivenings panel, and you’ll be able to apply your chosen label using the label options in the bottom of the Inspector panel. Once you’ve labelled all your quotes you can return to Outline mode, sort by label, and either drag each group of quotations into its own folder or just work from the sorted Outline view as you get to work on writing.
Step 6: Write your post, article, chapter, or book!
This is the point where the magic of Scrivener and Zotero pays off: By giving you a quote-driven structure for your article or chapter, or at least making it easy for you to find the quotations you need to flesh out the argument you have in mind. I’ve used this workflow both ways, either organizing my quotations into folders based on a prior structure, or letting the structure and argument emerge from the process of organizing my sources and quotations.
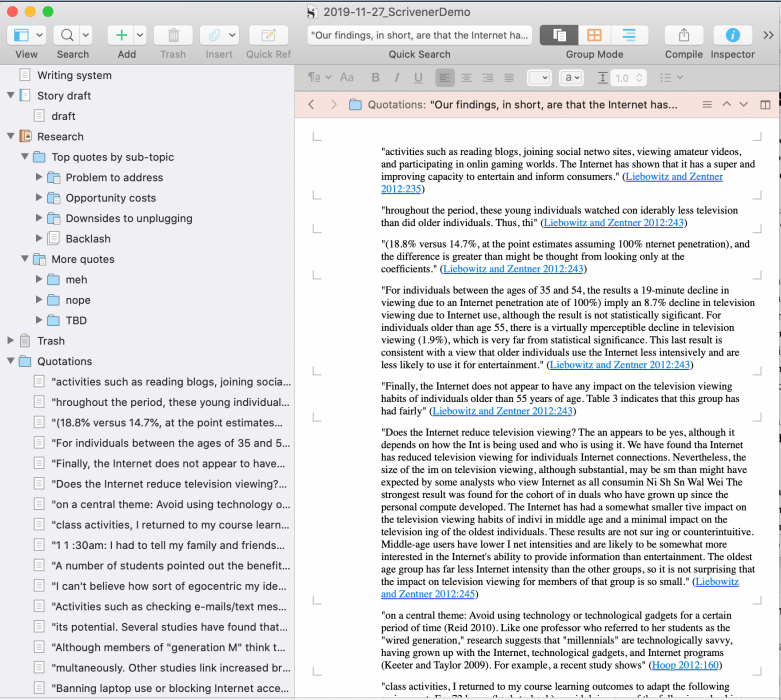
In either scenario, I like to treat my structured collection of quotations like an outline. I use Scrivenings mode to view everything in “Top quotes” at once, but all those quotation are separated into subsections based on the various subfolders I set up.
Next, I create a “Story draft” folder in the binder, which I use for drafting my story, and create a new “Draft” document inside the folder. Then I split my Scrivener view so that I can see my “Top quotes” folder and my “Story draft” folders side-by-side, and I set “Story draft” to Scrivenings mode and lock in place, just like I did for the “Top quotes” folder.
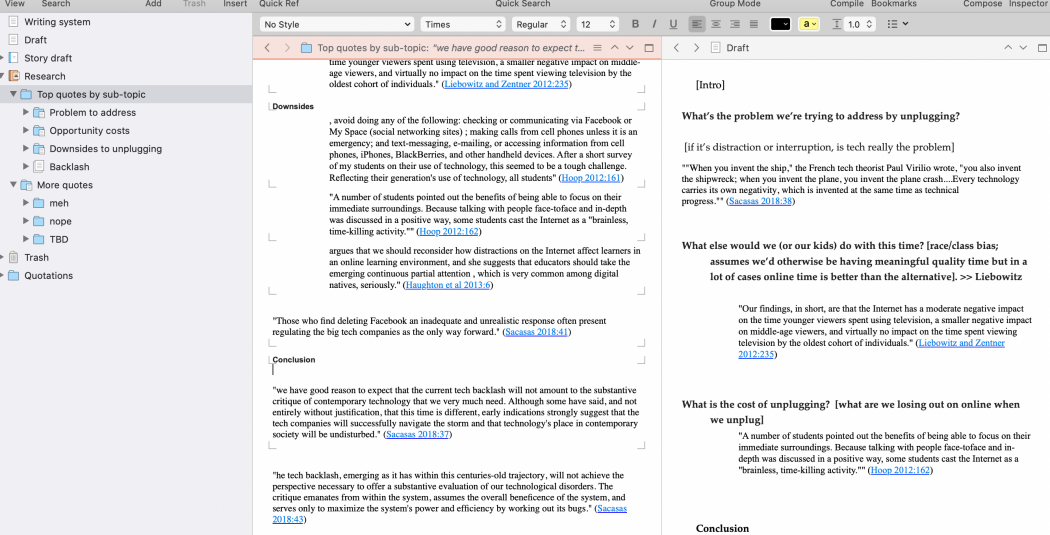
Now I start writing in my “Draft” document, dragging each quote I want to use directly from the “Top quotes” folder into the “Story draft” folder. If I want to insert a quotation in between parts of a text I’ve already written, I use the “split at selection” option to slice the Draft document into pieces, inserting the quotation into the gap. This is what my window looks like as I get underway:
Sometimes I actually start by dragging the quotations I want to use from “Top quotes” into “Story draft,” arranging them in the order I want for my story. Then I insert additional blank documents in between the quotations, and write the story around the quotations that are already in place. Scrivenings view makes it all look like a single document.
Weekly Newsletter
[contact-form-7]
When I’m finished writing, I either use Scrivener’s compile function to export the complete draft (with quotations) into a Word document, or (more often) simply copy everything that’s visible in the “Story draft” folder into a new document in Word or Google Docs. Before uploading my text to a site like JSTOR Daily, I copy my text from Scrivener to Word, and then from Word to a site like HTML Tidy, so I can preserve any hyperlinks but get rid of any weird tags that get created through the copy-and-paste process.
What will you write with Zotero and Scrivener?
This article has mapped out the way I use the Zotero-Zotfile-Scrivener combo to write my regular columns here at JSTOR Daily, but it’s a process I’ve adapted for other research-driven projects, too. Whether you’re an academic writing papers, a journalist writing articles, or a marketer writing blog posts, I suspect some version of this process can dramatically simplify and accelerate your own research-driven writing. If you try this process yourself—or have questions about how to apply it—I hope you’ll let us know!
Support JSTOR Daily! Join our new membership program on Patreon today.
The post How to Use Zotero and Scrivener for Research-Driven Writing appeared first on JSTOR Daily.
Recent Comments